Hi Everyone, I am super excited about this Class I took at the Altenew AECP Academy. It’s called all about Ink Blending and Amy Lee taught the class. This class teaches you some really great techniques. I learned it best to start ink blending on off the paper when you start so you don’t get harsh spots on your cardstock. So check out the class, it can really help you perfect your skill.
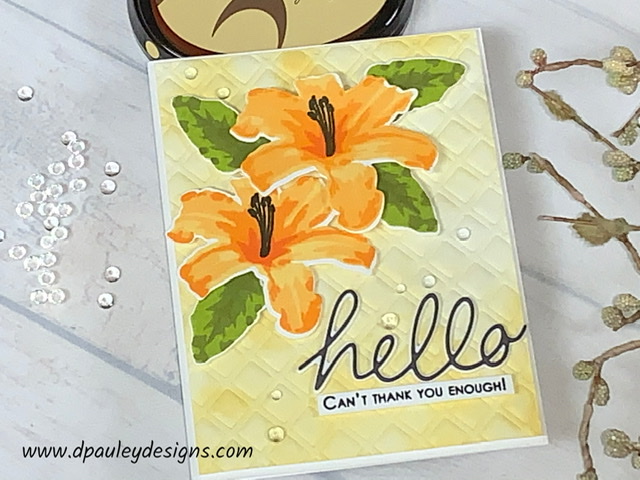
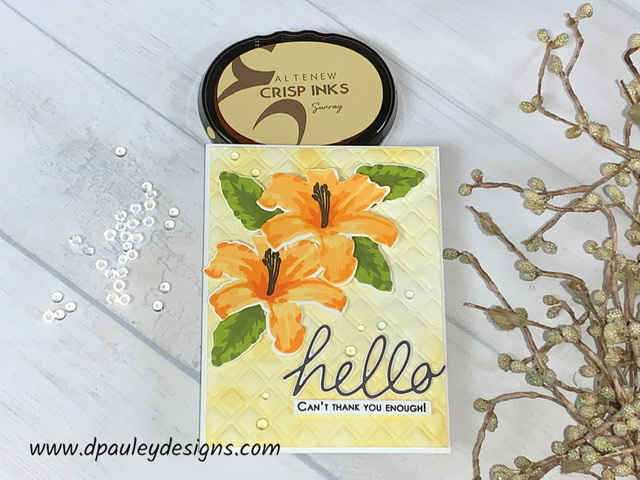
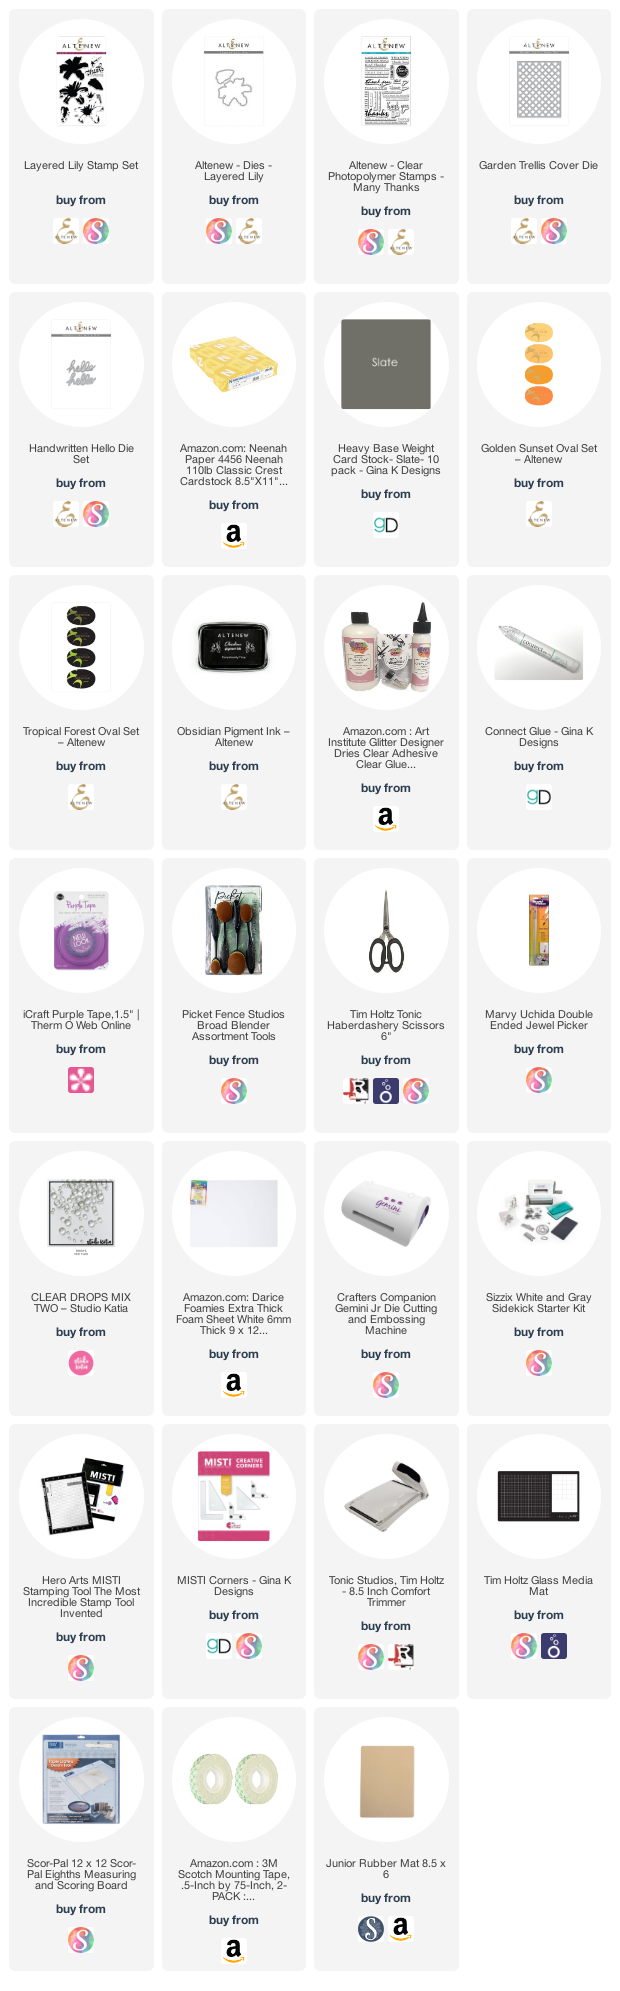
For my card today, I will be using the Altenew Layered Lily stamp and die set and the Altenew Garden Trellis Die. First I make a die impression using the Garden Trellis Die and an embossing mat. I take a piece of white cardstock that is 5 1/2″ x 4 1/4″ and I place the Trellis die on it. I run it through my Gemini Jr as if I was using an embossing folder. Once I am done I trim a 1/8″ off all the edges. Using the Altenew Sunray Ink and my Picket Fence Blending Brush I start to blend it on to the Garden Trellis Panel. I continue blending until I have the desired amount on the paper that I want. (If you would like to see the ink blending technique or how to make the whole card, see my youtube video below.)
Next I use the misti stamping tool to stamp my Layered Lilies. I start with the most solid image and I stamp it using the Altenew Sunray Ink. Then I bring in the second layer of the flower and stamp it with the Altenew Chamomile Ink. I now stamp the third layer of the flower with the Altenew Snapdragon Ink. This time I stamp it 3 times to make the center of the flower and the tips darker. I stamp the last image using the Altenew Marigold Ink. I stamp this center 3 times as well because I want the center to be the darkest part on the flower.
Now that the flower is done, I will bring in the center of the flower. I stamp it with the Altenew Obsidian Black Ink. (This black ink is awesome. It stamps nice and crisp). Now I proceed to stamp the leaves. I stamp the most solid image with the Altenew Olive Green Ink. Then I line up the second leaf image and I stamp it with the Altenew Moss Ink. When I stamp the final leaf image I use the same Altenew Moss Ink but I stamp it twice to make it look like I used a different color ink.
Once all my stamping is done I then use my Sizzix Sidekick Machine to die cut all of the flowers and leaves. (This little machine is awesome for cutting small images out. You don’t have to wait while it runs through a bigger machine. I highly recommend having one of these in your craft room 🙂
Next I die cut the Altenew Hello Handwritten Script Die from Gina K Slate Cardstock and the Hello Shadow Die from Neenah Classic Crest 110lb Cardstock two times. Using my Gina K Connect Glue I adhere all the die cuts together.
Ok on to the stamped sentiment. I am using the Altenew Many Thanks Stamps Set. The sentiment I chose is the Can’t Thank You Enough stamp. I used the Misti stamping tool to stamp the sentiment with the Altenew Obsidian Black Ink.
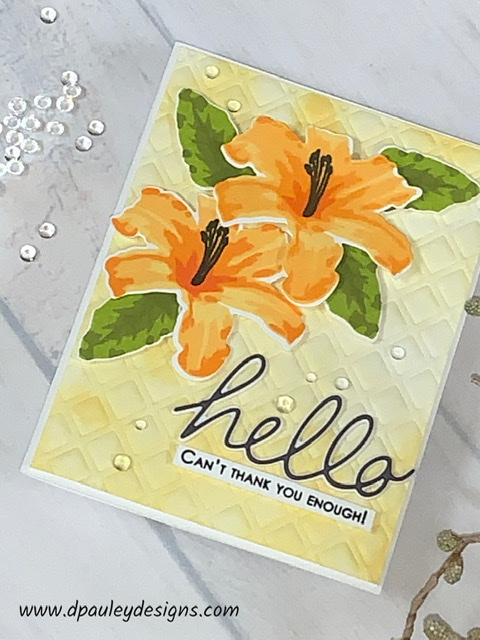
Yeah… now for the fun part. Putting the card together. I take a piece of Craft Foam and glue it to the back of the yellow blended panel using my Art Glitter Glue. ( If you don’t have craft foam you can glue together 3 pieces of cardstock and it will have the same effect.) Then I glue the panel to a piece of Neenah Classic Crest 110lb Cardstock folded to 5 1/2″ x 4 1/4″. Once that’s done I put foam tape on the back of all the flowers, leaves and the sentiment. Then I assemble the card. You put the flowers and sentiment wherever you want to . I chose to put the flowers in the top left corner of the card and the sentiment at the bottom of the card.
I just love putting gems on my cards. 🙂 I put the Studio Katia Dew Drops randomly on my card. Then using my jewel picker I glue them to the card.
That completes my card for today. If you would like to see how I made the card, please watch my Youtube Video listed below.


Very pretty card! I love the layered flower on the quilted background.
Thank you Karen!
Beautifully done! I like that background, gives and even softer look to the card with the beautiful ink blending.
Thank you for entering your work to the AECP assignment gallery.