Hello there……
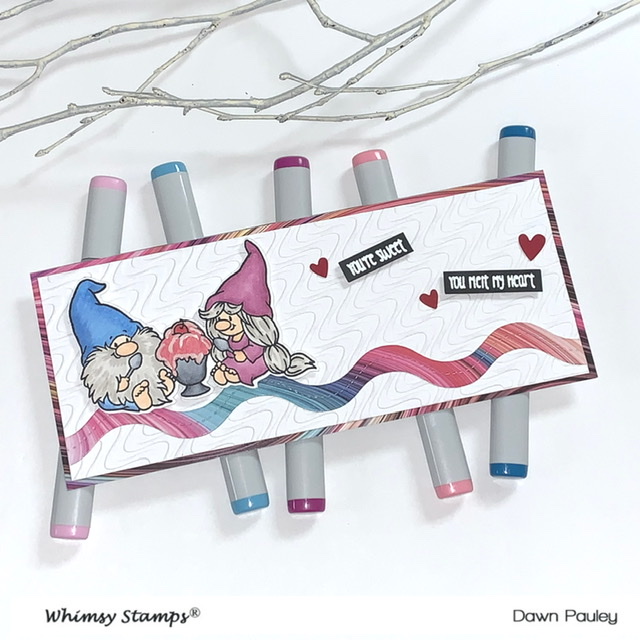
Today I am sharing how I made a card using a Slimline Embossing Folder and a Cute Gnome Stamp Set. I will quickly run down how I put the card together and if you want to see the step by step instructions. Please visit my YouTube Channel. The link to this video is below:
First, I stamp my image with a black copic friendly ink. I cut it out with my brothers scan n cut and then colored it with my copic markers.
I used Copic markers – B23, B24, and B32 for the boy gnomes clothes. E00 and R11 for his face, hands and feet. W1 and W3 for his beard.
I used Copic markers RV66 and RV63 for the girl gnomes clothes. E00 and R11 for her face, hands and feet. W1 and W3 for her hair.
I used Copic markers C5 and C1 for the Spoons and C7 and C3 for the ice cream cup and finally, I used RV13 for the ice cream and R29 for the cherry.
I put Nuvo simply white drops on the ice cream to make it look like whip cream.
I picked out the paper I wanted to use from the Taffy paper pack. I cut a piece out using the Slimline Wavy Edger Dies.
Then, I took a piece of white card stock cut to 4 ½” x 11 and put it in the middle of the Slimline Wave lengths embossing folder. Using my Gemini jr and I put the embossing folder on top of the bottom cutting plate and then the I put the top cutting plate over the embossing folder and ran it through my die cutting machine.
I glue the wavy edge to the piece of white card stock. Then, I take another piece of the Taffy paper and glue the piece of white card stock on top of it.
I put foam tape on the back of the gnomes and adhere them on top of the wavy line.
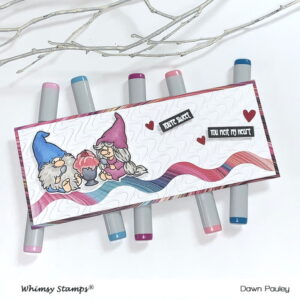
I stamped the sentiments “Your Sweet” and “You Melt My Heart” onto a piece of black card stock and stamped it with white pigment ink. Don’t forget to rub the embossing powder bag on the card stock before you stamp it. Then, I put white embossing powder on the sentiments and then heat embossed them.
I trimmed the sentiments down and then put foam tape on the back of them and adhere them to the card.
To finish off the card, I put 3 red hearts I had from the Slimline Heart Background die and adhered them to the card. I attached the gnome panel to a piece of white card stock cut to 8 ½” x 7 and I scored it at 3 ½”.
That completes my card for today. Check out all the details for this card on my YouTube Channel at https://www.youtube.com/channel/UC8F5AdZieOocqoTpYJ5ZAIw.
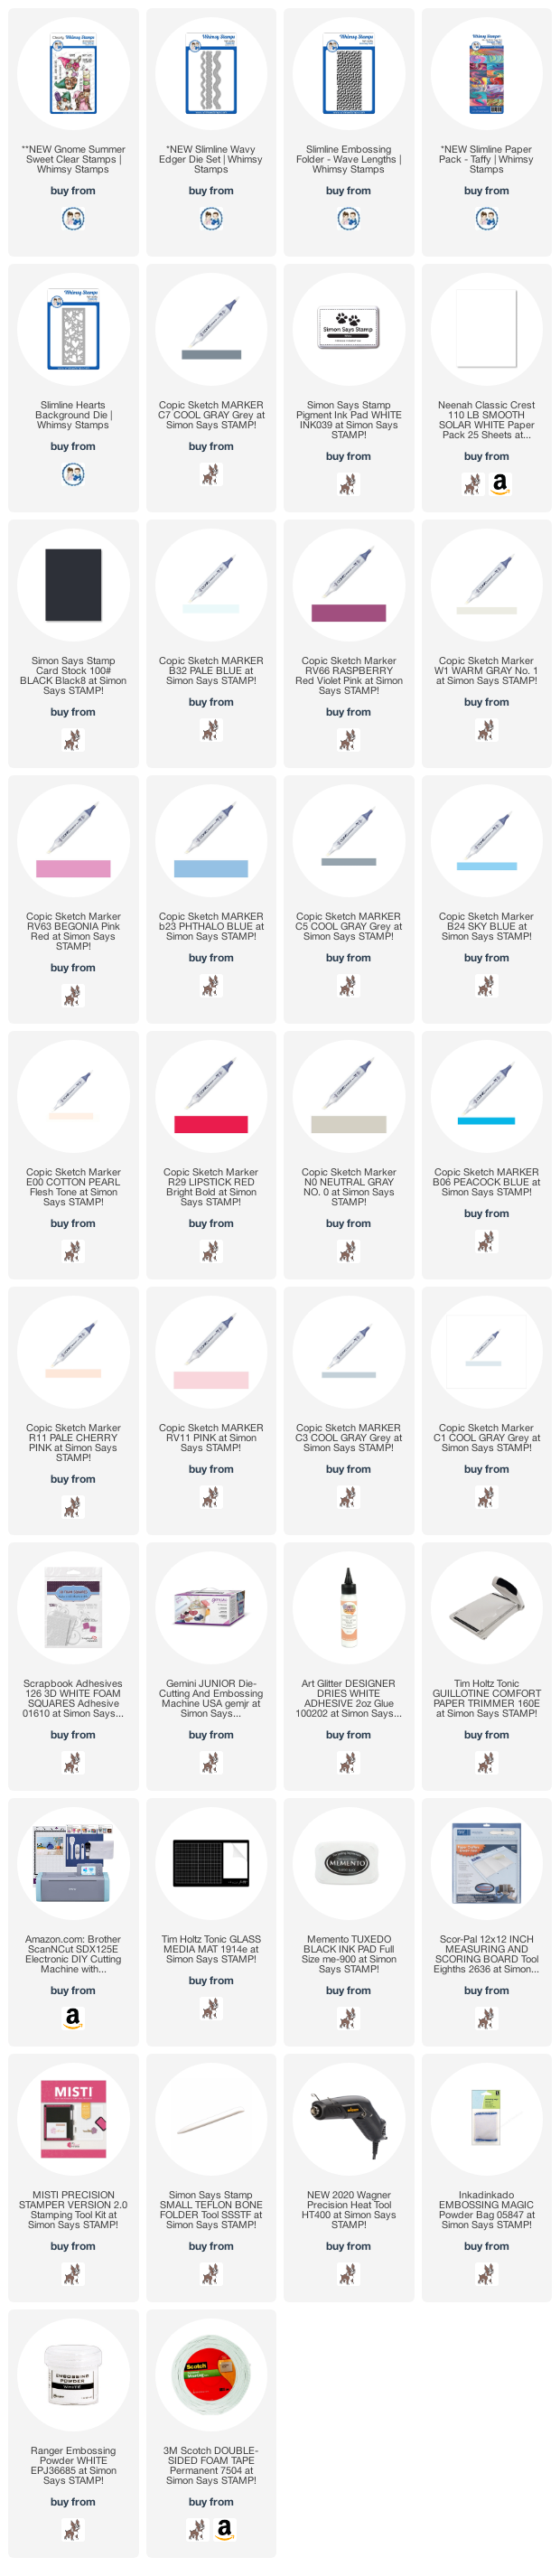
I have attached a list of the products I used to create this card if you are interested.
Affiliate Links may be used at absolutely NO Charge to you. All items have been personally purchased by me except for the Whimsy Stamp products which are supplied for being on their Design Team. I do not work for any of these companies. Whether gifted or products I bought, I only recommend products I personally use and like. All opinions are my own. Proceeds I make off of the affiliates helps me to offset some of the cost to maintain my blog, Youtube channel and supplies needed to bring you new content.
Copyright: I am happy to share my creations with you. I don’t mind if you use them for your own personal use. If you decide to share what you’ve made online, please link back to my Youtube Channel or Social Media post that inspired your design. While I love this and encourage it. It is NOT ok for someone to sell anything that was created by my design or to use my photos for any type of compensation. I appreciate your understanding in this.
D Pauley Designs is a participant in the Amazon Services LLC Associates Program, an affiliate advertising program. I may earn small commission off of your purchase.