HO HO HO…. Whimsy Stamps just has a NEW Mini Release today and they have some really great stamp sets available. So hop on over to their website to check out the entire new release.
Today, I’m sharing a quick and easy card using the new Woodland Silhouette Stamp set. This is a 4 “ x 6” stamp set and there are 12 pieces in the set. You get 4 images and 7 sentiments and a little snowflake.
So let’s get started.

Step 1. Take a piece of white card stock cut to 4 ¼” x 5 ½” and take the largest Whimsy Stamps Wonky Stitch Rectangle die to make a die impression. For ex. Lay the die face down on the piece of card stock (tape in place)
Then, place cutting plate down, then the embossing mat, then the card stock with the die on top and then another cutting plate and run it through your die cut machine. (please note: these instructions are for use with the Gemini Junior machine. Follow the embossing instructions for your die cut machine) Trim the paper down to 4” x 5 ¼” making sure not to cut the stitched edges.
Step 2. Stamp the Christmas Tree from the Whimsy Stamps Woodland Silhouette with black ink onto the middle of the embossed card stock. Then, using some masking paper, stamp another tree onto the masking paper. Then, fussy cut the tree out. It doesn’t have to be exact.
Step 3. Cover the tree you stamped with the masking paper tree cut out. Stamp another tree to the left of the first tree in the bottom left corner making it shorter than the first tree. (look at picture for example)
Step 4. Stamp another tree on the right side of the first tree. Make this tree slightly taller than the second tree you stamped. So, all three trees should be slightly different in height.
Step 5. Stamp a Deer onto a piece of white card stock. Either use a Brothers Scan n Cut or fussy cut the deer out.
Step 6. Adhere the deer in between the trees in the open space.
Step 7. Stamp the Sentiment “ Whishing you a Merry Christmas” onto the card with black ink.
Step 8. Cut a piece of black card stock to 4 ⅛” x 5 ⅜” and adhere it to the back of the card front.
Step 9. Cut a piece of white card stock to 8 ½” x 5 ½” and scor it at 4 ¼”.
Step 10. To finish off the card, adhere the card front to the card base.
This is such a quick and easy card to make multiples of.
And that completes my card for today.
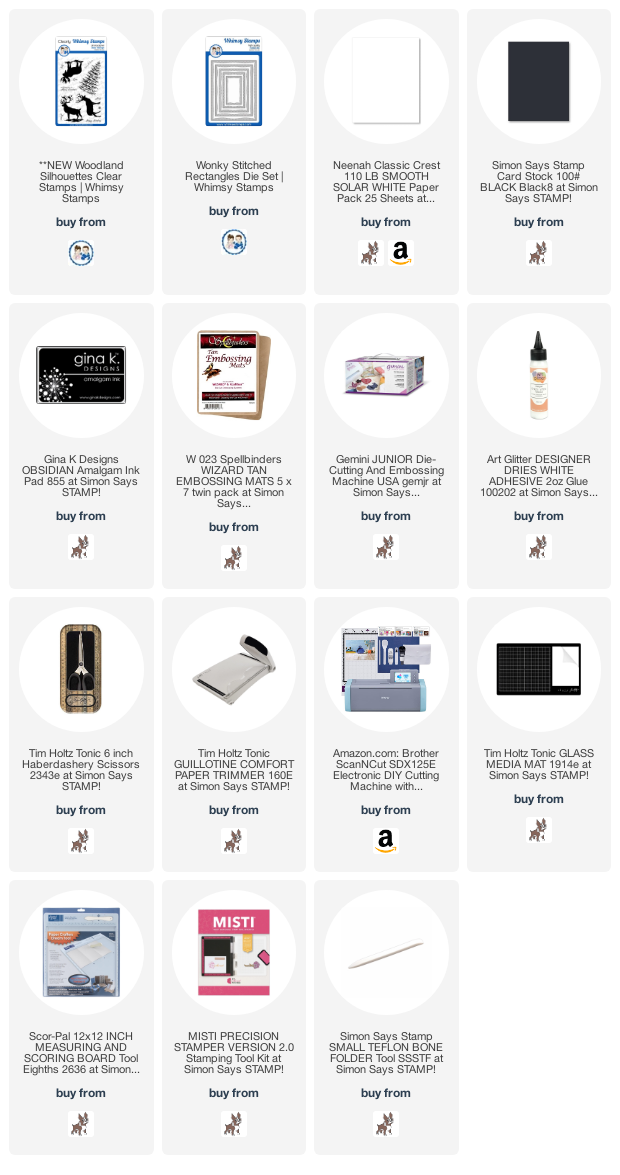
I have attached a list of the products I used to create this card if you are interested.
Affiliate Links may be used at absolutely NO Charge to you. All items have been personally purchased by me except for the Whimsy Stamp products which are supplied for being on their Design Team. I do not work for any of these companies. Whether gifted or products I bought, I only recommend products I personally use and like. All opinions are my own. Proceeds I make off of the affiliates helps me to offset some of the cost to maintain my blog, YouTube channel and supplies needed to bring you new content.
Copyright: I am happy to share my creations with you. I don’t mind if you use them for your own personal use. If you decide to share what you’ve made online, please link back to my Youtube Channel or Social Media post that inspired your design. While I love this and encourage it. It is NOT ok for someone to sell anything that was created by my design or to use my photos for any type of compensation. I appreciate your understanding in this.
D Pauley Designs is a participant in the Amazon Services LLC Associates Program, an affiliate advertising program. I may earn small commission off of your purchase.