Hi Everyone and Welcome,
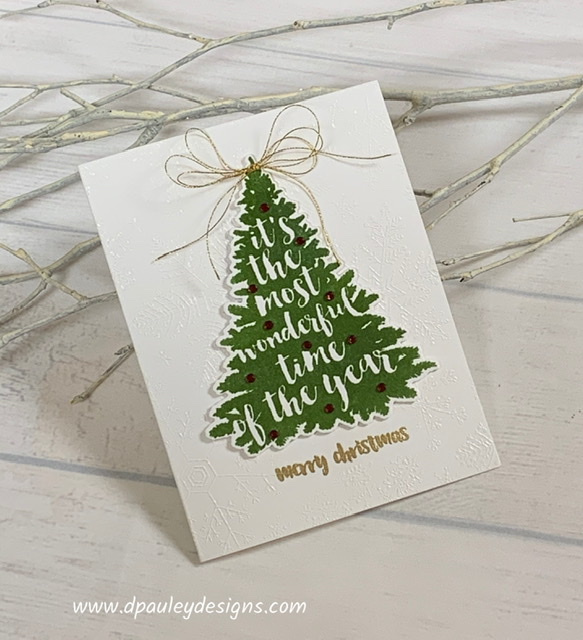
I’m so glad you stopped by. Today I’m going to be showing you how to make this pretty simple christmas card. This is my Design Team submission for our November Challenge over at the Papercraft Business Challenge Blog. The theme this month is Christmas! Why not top by and join in on the fun!
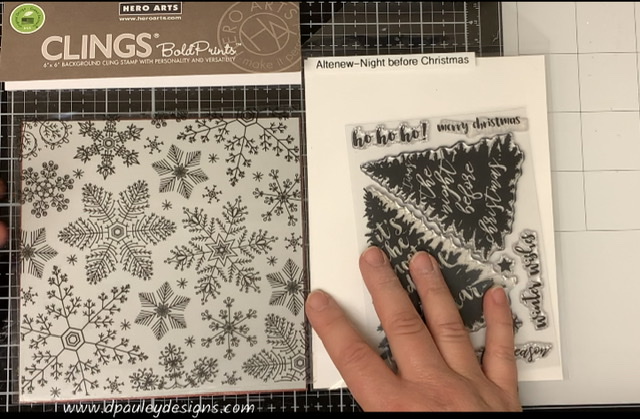
I will be using the Altenew Night Before Christmas Stamp set and the Hero Arts Hand drawn Snowflake background stamp.
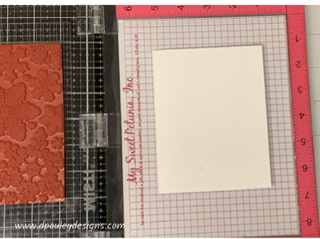
I’m going to us my Misti stamping tool today because it will be much easier. First I take out he foam in the Misti because the background stamp is so thick. Then I put a little bit of Tombow removable tape down to hold my cardstock in place.
I use a piece of Neenah Classic Crest cardstock Folded to 4 ½” x 5 ¼”. I place the stamp over the cardstock.
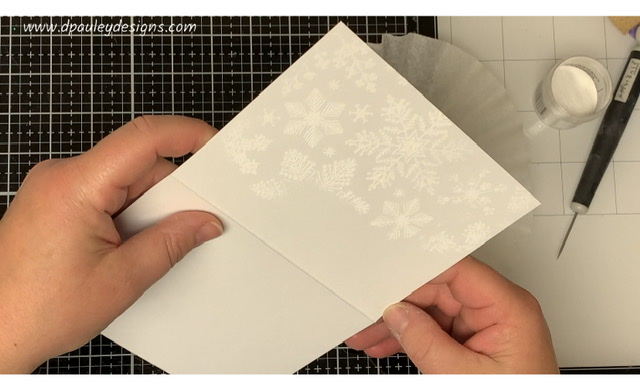
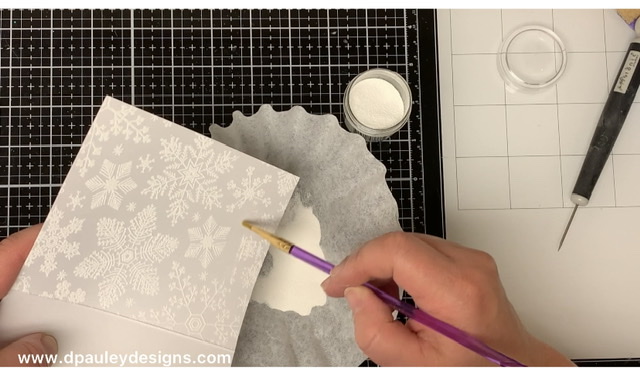
I rub the cardstock with an Embossing Powder Bag and then cover the stamp in Versamark Ink. Then I stamp the cardstock making sure to press down really hard to give it a really good impression because the stamp is so big.
Then using the Ranger White Embossing Powder I cover the entire paper with it. I hold it over a coffee filter so when I’m done I can just pour the powder back in the jar.
When I’m done, I will then use a Paint Brush to brush away any embossing powder where I want the sentiment to go.
I wait for my Heat Gun to get good and hot and then I move it all around the card trying not to stop in one place for too long. When I have a big area to heat, I like to keep my paper on my Glass Media Mat. I feel like it helps to prevent the paper from warping so much.

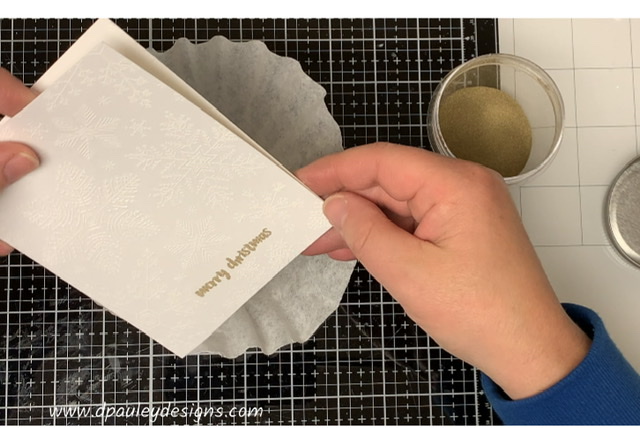
I’m going to heat emboss the Merry Christmas sentiment on the card using my Misti again. First I rub the paper with the Embossing Powder Bag. Then I use Versamark Ink to stamp the sentiment.

This time I’m going to use the Ranger Gold Embossing Powder and then I heat the sentiment with my Heat Gun.
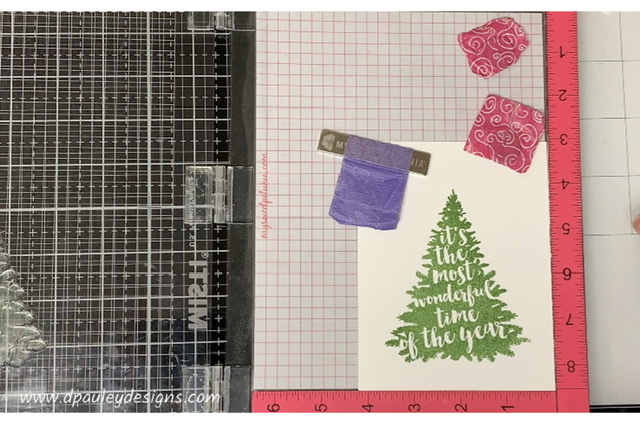
When I’m done, I put the card aside and now I’m going to stamp the Christmas tree. I chose to use my misti tool again because I plan to triple stamp this tree to give it a really deep impression and using the misti makes it much easier to line up the image. I use the Altenew Forest Glade Ink to stamp the image. Now this ink will stay wet for a little bit which will allow enough time so that I you can add embossing powder to it. I wanted the Christmas tree to have a shine to it.
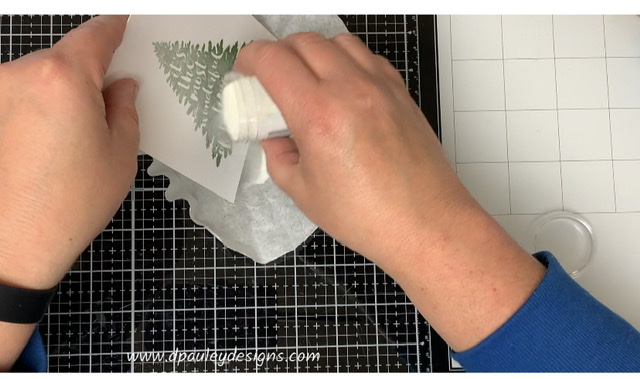
This time I use the Ranger Clear Embossing Powder and then heat the Christmas tree with my Heat Gun.
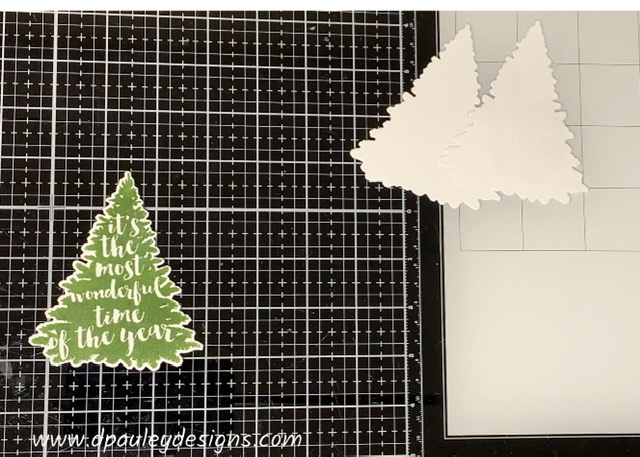
I die cut the christmas tree along with 2 white christmas trees.
Then I glue the 2 white trees to the back of the green tree to give it added dimension on the card,
I glue the Christmas Tree onto the card where I want it to go.
Then I take the Altenew Metallic Thread and cut it to about 14 inches long. I put Art Glitter Glue at both ends of the thread so that they don’t fray and I let it dry for a few minutes.
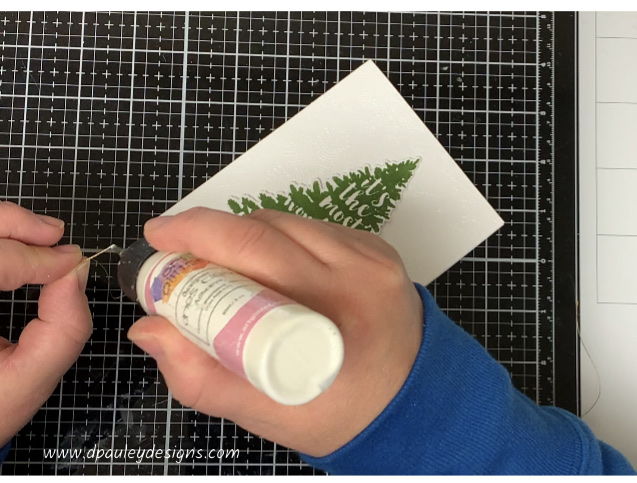
I hold the thread between my fingers going back and forth in a figure 8 motion until I have 3 loops on both sides (You can put as many loops as you want to) I only wanted to put three.
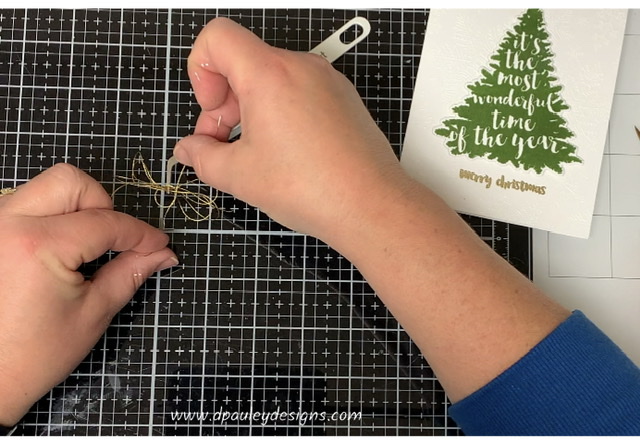
Then I take my Tweezers and I use them to pinch the thread. I take another piece of thread about 5 inches long and put glue on both ends of it so it doesn’t fray.
Then I tie the piece of thread in the middle of the other thread— that’s in the tweezers—– and put a double knot in the middle of it to hold the bow in place…
I put a drop of glue on top of the tree and hold the thread in place using my tweezers.
While the glue is drying on the bow. I wanted to add some gems to the Christmas tree to make them look like ornaments. I’m using the Honey Bee Stamp Stick on Gems. I used the rainbow collection but I linked below to the Christmas gems as well as the rainbow collection.
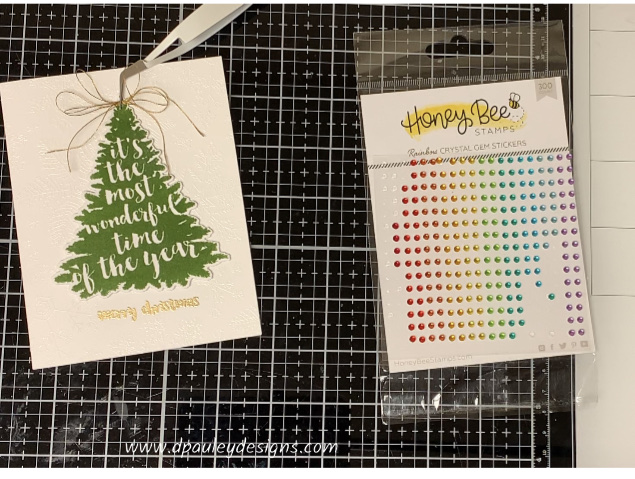
I place them where I want them to go on my tree. I decided to add some glue to help them stick better only because I’m putting them on an embossed surface. But you don’t need to do this if you don’t want to. They do stick pretty well on their own.
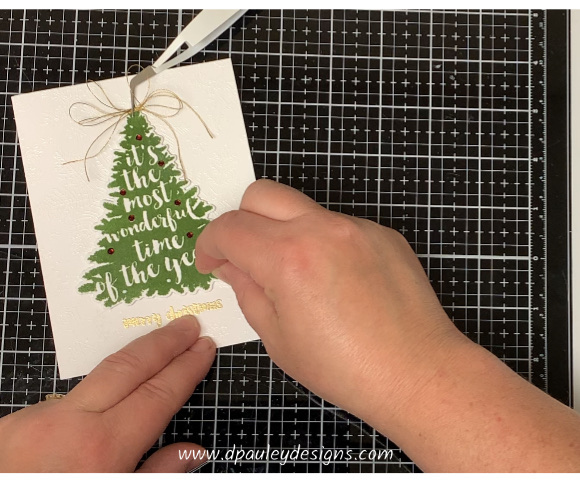
This card is very shiny because the tree and the snowflake background are embossed.
That completes my card for today. If you would like to see how I made the card, please watch my Youtube Video listed below.


Very nice, Dawn! Cute card and simple to make for easy duplicity! Love it!
Thank you Janet. I appreciate you taking the time to leave me a comment 🙂
A beautiful card, Dawn! I love the way the sentiment is on the tree! The embossed background makes it very special! Take care! 🙂